Salesforce has been reshaping businesses for more than two decades. Today, it works on three significant philosophies – low-code, no-code, and pro-code. Businesses use these philosophies to streamline customer relationship management and automate various workflows.
SFDX enhances the Salesforce developer experience by promoting efficient, modular development and enabling easy collaboration between developers and admins, especially with tools that circumvent the traditional command-line interfaces.
With scratch orgs, Salesforce developers can construct and test applications in isolated environments, streamlining deployment and minimizing risks.
The Salesforce CLI emerges as a critical feature in SFDX, offering a comprehensive set of commands that simplify organization management, data manipulation, and metadata operations.
🖥️
This article focuses on the pro-code philosophy, especially the Salesforce Developer experience. Salesforce DX (SFDX) allows Salesforce Developers to use the full potential of Salesforce. It offers an immersive and efficient approach to Salesforce application development and deployment.
What can you expect? A lot! We will talk all about what SFDX is, what it has to offer, SFDX best practices, and tips and tricks. It doesn't matter if you're a seasoned Developer or a newbie-koala – this article benefits the whole segment of Salesforce Developers.
Understanding Salesforce development tools
Salesforce development tools are a set of software used to create, customize, and launch Salesforce applications. From development to testing and deployment, these tools maximize the investment returns of businesses, for example, Developer Edition Environment, Salesforce extensions for VS Code, CLI, developer console, etc.
What is Salesforce Developer Experience (SFDX)?
One such tool is SFDX, an improved, flexible, and developer-friendly successor to Salesforce Classic. As the name suggests, it is built for Salesforce Developers to work more efficiently.
One such application is code modularization and flexible packaging of applications. Salesforce DX isn't just for Developers – it's about making development more accessible for everyone. It allows mixed teams of Developers and Admins to collaborate seamlessly.
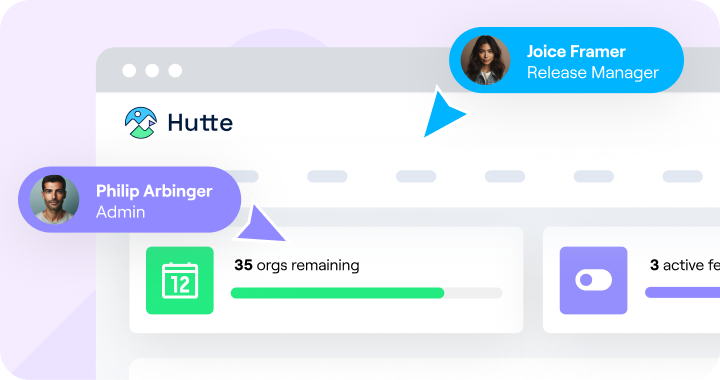
Today, with tailored tools for org management and collaboration – like Hutte and Hutte Recipes – you can create scratch orgs, change code, and deploy without touching the command line. This simplifies the DevOps process and enables flexibility in tool choices.
SFDX and DevOps
SFDX forms a bridge between Salesforce Developers and Administrators, promoting DevOps collaboration. To be clear, SFDX only fulfills some of the needs for Salesforce DevOps. But it does help Salesforce teams with version control, CI/CD pipelining, and source-driven processes, which in turn helps the DevOps teams.
Key features of SFDX
The SFDX toolbox has numerous features that have changed the lives of Salesforce Developers and DevOps teams. Let's talk about some of the most comprehensive features:
Scratch orgs
SFDX allows you to create and work with scratch orgs within a snap. It helps Developers build and test applications in a completely organized and isolated way.
Salesforce CLI
It is probably the most prominent feature of SFDX. The Salesforce CLI offers a chain of commands. From the commands to handling org management and data manipulation to metadata operations, you get everything at your fingertips.
Source-driven development
SFDX uses source-driven development, where you can define the metadata in source code files. Your configurations reside in version-controlled files, which empower you with traceability, collaboration, and automated deployments.
Version control
SFDX seamlessly integrates with Git, allowing you to track and configure your code and collaborate effortlessly. This means no code-loss headache.
CI/CD pipelines
SFDX also automates deployment processes, reduces manual errors, and accelerates the release cycle.
Automation testing
Automation testing with SFDX feels like a breeze thanks to the built-in unit and integration testing support. It also allows you to create test suites for validating your code's accuracy.
Dev Hub org
The Dev Hub org is your central command post for managing scratch orgs. It allows you to create, manage, and gather insights into scratch orgs and second-generation packages. Any paid Salesforce org or free developer edition org can act as a Dev Hub.
Second-generation packaging
Also known as 2GP, it facilitates app distribution by supporting unlocked packages in Dev Hub. It operates on package-driven development, enabling easy installation of unlocked packages and their versions.
All these and numerous more features enhance the overall developer experience.
Before and after SFDX
Before SFDX
Salesforce used to be very bullish on the 'low code' and 'no code' philosophy. But Developers stretched past the platform's limits, which made their lives hard.
Before SFDX, Developers would develop and deploy directly into production or sandbox environments.
Version control and testing were also challenging. Developer conflicts were the most common cause of project delays and complications, which called for a solution from Salesforce.
After SFDX
Salesforce had to develop a solution called SFDX. Since its beta launch in the Summer of '17, it has changed developers' lives.
SFDX introduced scratch orgs for clean and safe development. It also included integration with Git for robust version control, among other features.
Key benefits of SFDX
Salesforce DX has completely changed the way Developers look at Salesforce development. Let's look at some of the key benefits:
Effortless collaboration for all
It supports an end-to-end collaboration of Developers and testers in the SDLC (software development life cycle). SFDX covers every phase of the development journey, from the project's inception to code deployment. With SFDX, your development process becomes a well-orchestrated symphony.
Automation, code control
SFDX follows a package-based, source-driven development approach and significantly uses VCS (version control system). This blend gives Developers a clear view of code changes and allows them to maintain code integrity confidently.
DevOps for faster, better results
Through SFDX, you can automate testing processes, have collaborative version control, and achieve more frequent releases via continuous integration and deployment pipelines.
Metadata organization and seamless app sharing
SFDX also helps streamline metadata organization for teams and organizations. It simplifies metadata management using a source-driven, command-line-centric approach. This makes sharing applications within and beyond your organization's walls easy.
Insights into dependencies
SFDX provides a robust dependency API that gives Developers a clearer view of the dependencies between metadata. When you run queries on this API, you can see which components rely on others. In short, the dependency API simplifies development and reduces the likelihood of coding errors.
Getting started with SFDX
✅
Now that you know why SFDX was needed, how it helps, and how significant it has been, let's discuss the practicalities. Before getting on with SFDX tips and tricks, ensure you have a solid setup. Here's what you need to do beforehand:
Enable Dev Hub: Login to your Developer Edition. From "Setup," find, click on, and enable "Dev Hub."
Install VS Code and CLI: Visual Studio (VS) Code is the playground where you'll play with code, CLI, and deployments. The CLI acts as your gateway to SFDX. You can verify the installation by running 'sfdx' in the terminal or command prompt.
Authentication: After installation, authenticate with your Salesforce org. This step is crucial for accessing and managing your Salesforce data using SFDX. Use the 'sfdx force:auth:web:login' command to initiate the authentication process.
Install Salesforce Extension pack in VS Code: Launch VS Code, click the "Extensions" icon on the left toolbar, search for "Salesforce Extension Pack," and click "Install."
Set up scratch orgs: Scratch orgs are where the magic happens. Access the command palette in VS Code and select the 'sfdx: create a default Scratch Org…' command. You can also customize these to your desired duration and edition.
Verify scratch org: Go to the command palette in VS Code to verify the scratch org. Find 'sfdx: Open Default org' and press "Enter" to open the created org.
An example of a SFDX workflow
♻️
There is no exact path that all teams must follow while working with SFDX. But in this section, you will learn about a general workflow using feature branches.
Begin by creating a "feature branch" from the main branch in your Git repository.
Prepare a scratch org tailored to your project's needs.
Start coding or making changes in your scratch org or preferred coding environment. The point is to keep them in sync.
When your work is ready, create a pull request and assign it to a colleague for review.
If the review goes well, merge your feature branch into the main branch. Then, delete the feature branch to keep things organized.
Your work moves onto testing, either User Acceptance Testing (UAT) or Quality Assurance (QA), to guarantee top-notch results.
Once done, release it to production.
Remember, teams tailor this workflow to suit their requirements, emphasizing effective collaboration and project organization.
SFDX best practice: Tips and tricks
Step 1: Setting up your SFDX workspace
Create a dedicated workspace: Choose a directory or folder to store all your SFDX projects. This separation keeps your work organized and makes it easier to manage multiple projects.
Use version control: Install Git on your machine if you haven't already. Initialize a Git repository in your project folder using the 'git init' command. Add your project files to the Git repository with 'git add' and commit them with 'git commit -m "Initial commit."'
Connect your Git repository to a remote Git hosting service like GitHub or Bitbucket for collaboration.
Working with scratch orgs
Create a default Dev Hub org by running 'sfdx force:org:list' and then 'sfdx force:config:set defaultdevhubusername=YOUR_DEV_HUB_USERNAME.'
Set up a scratch org definition file (such as 'project-scratch-def.json') specifying the features and settings you need for your scratch org.
You'll create a scratch org using the definition file with the command 'sfdx force:org:create -f path/to/project-scratch-def.json -a YOUR_ALIAS.'
Use the newly created scratch org for development by running 'sfdx force:source:push -u YOUR_ALIAS.'
Step 2: Streamlining your development workflow
Source-driven development means defining your Salesforce metadata in source code files, such as objects, fields, Apex classes, and Lightning components.
Use the SFDX source format, which includes metadata files in the 'force-app/main/default' directory.
Use SFDX commands like 'sfdx force:source:push'and 'sfdx force:source:pull' to sync your local source with your scratch org.
Effective version control
Choose a version control branching strategy such as GitFlow.
Create feature branches for new features or bug fixes using 'git checkout -b feature/your-feature-name.'
Commit changes to your feature branch using 'git commit -m "Your commit message."'
Merge feature branches back into the main development branch when ready.
Use Git tags to mark significant releases or milestones.
Step 3: Optimizing testing
Use the Salesforce test framework to write unit tests for your Apex classes and triggers.
Cover different scenarios and edge cases within your tests. Ensure that your tests provide adequate code coverage (typically at least 75%).
Create mock data within your tests to simulate real-world scenarios. Use test data factories or utility classes to generate test records.
Automate testing
Set up a CI/CD pipeline (such as Jenkins and CircleCI) for your SFDX project that triggers automated test execution on code commits.
Configure your CI environment to use Salesforce CLI to run tests in scratch orgs. Use the 'sfdx force:apex:test:run' command to execute automated tests after commits.
Define code coverage thresholds in your CI pipeline to prevent code deployment with insufficient test coverage.
Step 4: Creating a smooth CI/CD pipeline. Set up automated builds
Configure your CI/CD pipeline to automate the build process when changes are pushed to your version control repository.
Include steps in your pipeline to run tests ('sfdx force:apex:test:run'), generate deployment artifacts, and package your code.
Incorporate validation steps
Implement pre-deployment validation steps in your CI/CD pipeline to ensure code quality.
Include code review processes in your pipeline to catch issues before they reach production.
Step 5: Enhancing collaboration and communication
Communicate openly with team members through messaging platforms or collaboration tools.
Use pull or merge requests in your version control system for code review and collaboration.
Managing conflicts gracefully
Always pull the latest changes from the remote repository.
Resolve merge conflicts gracefully using Git's merge tools, such as 'git mergetool.'
After resolving conflicts, thoroughly test your code to ensure it works as expected.
Step 6: Advanced techniques. Optimize large-scale projects through modularization
Divide your large-scale project into modular components with well-defined boundaries. Maintain separate directories for each module to prevent code overlap.
Component reusability
Design your components to be reusable. Use custom Lightning components, Apex classes, and LWCs across different parts of your application.
Governor limits management
Regularly monitor your code for compliance with Salesforce governor limits. Use tools like Salesforce Optimizer to identify potential limit breaches.
Performance testing
Set up automated performance testing using tools like Apache JMeter or Salesforce-specific performance testing tools. Identify and address performance bottlenecks early in the development process.
Explore extensions and plugins
Salesforce extensions for VS Code: Utilize features like code completion, integrated debugging, and deployment capabilities directly within your code editor.
Salesforce CLI plugins: Plugins can extend the functionality of the CLI for tasks like data manipulation, metadata retrieval, and testing.
Version control extensions: Integrate version control extensions like GitLens or GitHub Pull Requests into your VS Code environment.
🔌
These extensions directly simplify collaboration, code reviews, and version control management from your code editor.
Step 7: Practical tips and tricks
Tip 1: Quick scratch org creation
Use the 'sfdx force:org:create -f path/to/project-scratch-def.json -a YOUR_ALIAS' command with a scratch org definition file to create scratch orgs swiftly. '-f path/to/project-scratch-def.json' specifies the path to your scratch org definition file and '-a YOUR_ALIAS' assigns an alias to your scratch org for easy reference.
Tip 2: Git mastery
Commit early and often: Use 'git commit -m "Your commit message"' to commit changes frequently to your Git repository. Frequent commits make it easier to track changes and collaborate effectively.
Write meaningful commit messages: Write descriptive commit messages that convey the purpose of each commit. A well-structured commit message makes reviewing the code easy for other Developers.
Utilize branches for feature development: Create feature branches using 'git checkout -b feature/your-feature-name.' Feature branches isolate the development of specific features or bug fixes, making it easier to manage changes.
Resolve conflicts efficiently: When conflicts arise during branch merging, use 'git mergetool' to resolve conflicts gracefully. Ensure that your code remains functional after conflict resolution.
Tip 3: Test data generation
Use Apex to generate test data within your test classes programmatically. This approach ensures consistency and avoids reliance on static data that may change over time. For example, create test records for objects directly within your test methods.
Tip 4: Set up continuous integration
Integrate your SFDX project with your CI/CD pipeline to automatically execute automated tests ('sfdx force:apex:test:run') upon code commits. Ensure test results are reported to your CI/CD environment for analysis.
Tip 5: VS Code efficiency
Install Salesforce extensions for VS Code: Install Salesforce-specific extensions and plugins to enhance your development environment.
Utilize features: Take advantage of VS Code's features, including code autocompletion, syntax highlighting, and integrated Git support. Use the integrated Salesforce CLI within VS Code to execute SFDX commands directly from the editor.
Tip 6: Governor limits awareness
Familiarize yourself with Salesforce's governor limits, which restrict the resources and operations allowed in a single transaction.
Review the Salesforce documentation to understand these limits and plan your code accordingly to avoid unexpected issues in production.
Tip 7: Troubleshooting deployments
Learn about deployment logs: In case of deployment failures, access deployment logs to identify specific errors or issues. Analyze the logs to pinpoint the root cause of deployment problems.
Rollback plan: Always have a rollback plan ready for production deployments. In the event of deployment issues, you can quickly revert to a stable state to minimize downtime.
Tip 8: Resolve metadata conflicts
When working collaboratively, metadata conflicts may occur when multiple Developers modify the same components simultaneously. Use your version control system's merge capabilities to resolve these conflicts efficiently, ensuring that your codebase remains harmonious.
Tip 9: Scratch org cleanup
As you create and work with scratch orgs, managing them is essential.
Periodically clean up and delete unused scratch orgs using the 'sfdx force:org:delete' command to stay within your allocated resources and reduce clutter.
Tip 10: Custom scripting for automation
Use your preferred scripting language (such as Bash, Python, and PowerShell) to create custom scripts for automating various development tasks. Examples of tasks to automate include:
Data seeding
Metadata deployment
Scratch org setup
Automated test execution.
Tip 11: Performance optimization
Break down large-scale projects into manageable modules for large and complex projects with dedicated development teams and scratch orgs.
Prioritize component reusability to minimize code redundancy and maximize efficiency.
Conduct performance testing: Rigorously test your code for performance bottlenecks, especially in large-scale projects. Identify and address these issues early in the development process to ensure optimal performance in production.
Troubleshooting common SFDX issues
Scratch org creation failures
Issue: You may encounter errors when creating scratch orgs, hindering your development progress.
Solution: Verify your scratch org definition file for errors, ensure you have allocated enough Salesforce licenses, and check if Dev Hub is enabled.
Deployment failures
Issue: Deploying changes to production or other environments may fail, resulting in deployment errors.
Solution: Review deployment logs to identify specific issues, double-check metadata dependencies, and verify access permissions.
Version control conflicts
Issue: Conflicts may arise when merging branches or collaborating with team members in a version-controlled environment.
Solution: Utilize Git's merge tools to resolve conflicts, communicate effectively with your team, and establish clear branching strategies.
Governor limit exceedances
Issue: Your code may inadvertently exceed Salesforce governor limits, leading to runtime errors.
Solution: Monitor your code's resource consumption, refactor code to stay within limits, and employ bulk processing where necessary.
Test failures
Issue: Automated tests may fail for various reasons, including data-related issues or unexpected changes.
Solution: Debug failing tests, validate your test data generation process, and ensure that your test classes are robust and up to date.
Troubleshooting techniques
Effective error logging: When encountering issues, sift through error messages. They often contain valuable clues about the root cause of the problem.
Utilize debugging tools: Use tools like Salesforce Debug Logs, Visual Studio Code Debugger, or browser developer tools to inspect code behavior and diagnose issues.
Check documentation: Salesforce provides one of the most comprehensive documentation in the world. Use it to understand features, limits, and error messages better.
Get tailored tips from the Trailblazer community
If you want to learn more about SFDX, here are some of the most popular Salesforce-led resources and communities:
Salesforce Trailhead: Salesforce Trailhead is a free, interactive learning platform that offers modules, trails, and projects to help you build your SFDX skills progressively.
Salesforce Trailblazer Community: Join the Salesforce Trailblazer Community to connect with fellow Developers, ask questions, share knowledge, and engage in discussions related to Salesforce development.
Salesforce Stack Exchange: The Salesforce Stack Exchange is a Q&A platform where you can ask and answer questions related to Salesforce development. It's a valuable resource for troubleshooting and getting solutions to specific problems.
📧
Do you have any personalized queries about SFDX, Salesforce DevOps, or Salesforce for your business?
The integration of Einstein Copilot across Salesforce applications, including development environments, allows for enhanced automation of tasks using AI. This can significantly streamline workflows in SFDX by automating repetitive tasks and providing AI-driven insights directly within the development process.
Prompt Builder
The new Prompt Builder feature enables developers to create, test, and refine prompt templates without needing to write code. This feature is highly relevant for developers using SFDX as it simplifies the integration of dynamic CRM data into workflows, which can be invoked through Flow, Lightning Web Components, and Apex.
Service Cloud Einstein
This feature provides AI-driven answers directly within the development environment, allowing developers to access trusted Knowledge Articles quickly. For those working with SFDX, this means less time searching for solutions and more time focusing on development.
Sushrut is a skilled Salesforce Developer, Technical Writer, and Entrepreneur. His expertise includes front-end dev, Web3, and DevRel. He leverages technology to craft exceptional digital experiences.