With the immensely growing popularity of Salesforce Flow, which brings in more than one trillion monthly automations globally and $1 trillion in customer business value, there is a massive demand for Flow-specific custom components and Apex actions.
CPEs are Lightning Web Components that allow for the creation of tailored UIs for admins, enhancing the design and usability of custom Apex actions or Flow screen components.
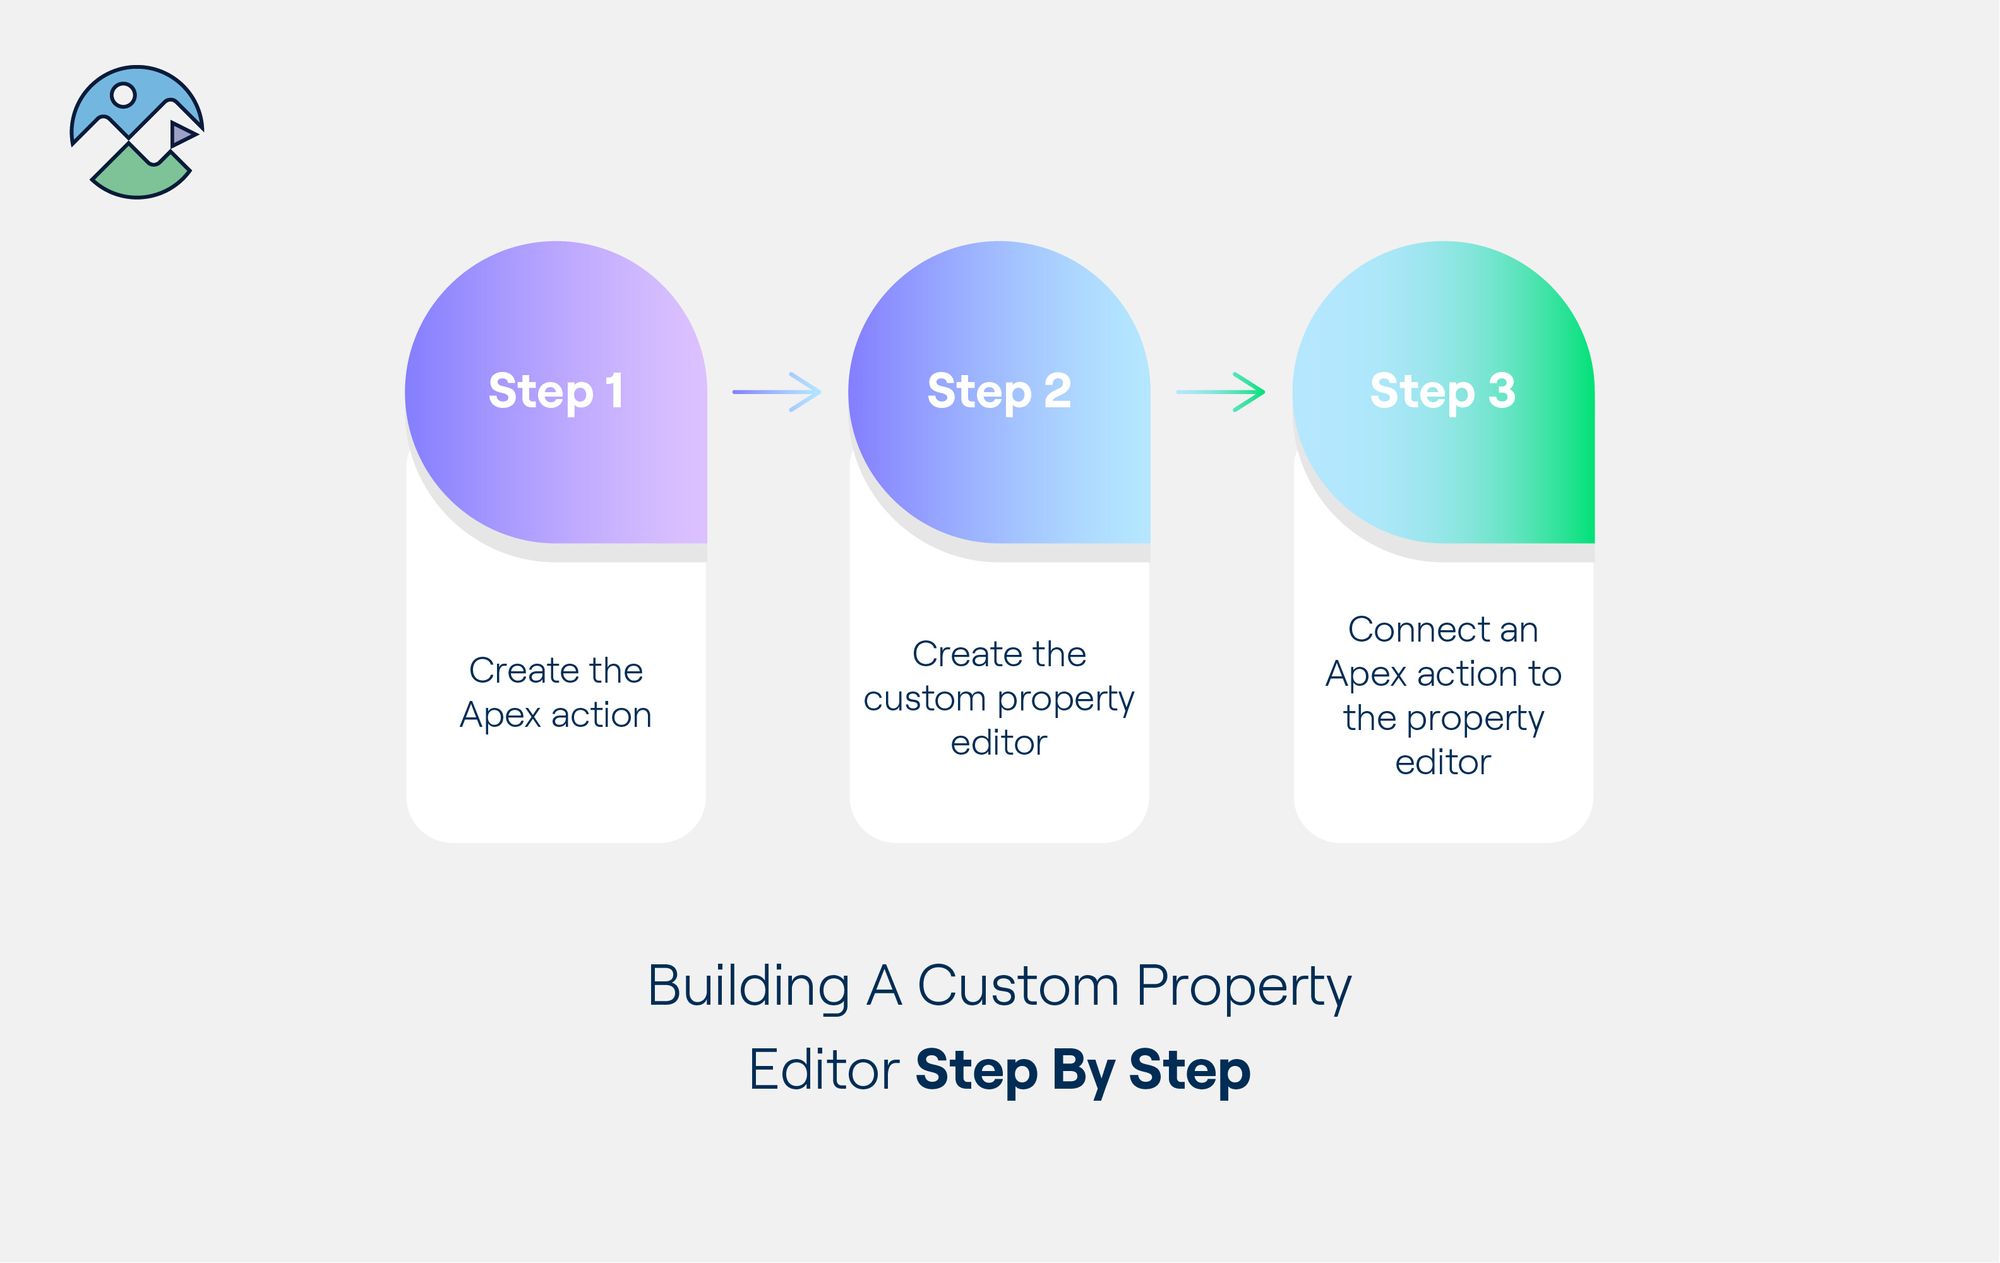
The article provides a step-by-step guide on creating a CPE, starting with an Apex action example that concatenates two strings, followed by the development of the CPE itself.
Utilizing CPEs can lead to more dynamic, user-friendly, and error-resistant UIs, which are self-documenting and reduce the need for separate reference documents.
Some of these actions and components are so complicated that admins require documentation to configure them.
In comes the Custom Property Editor! Custom Property Editor is an excellent solution for creating tailored UIs for admins using the custom Flow screen components and Apex actions.
But to truly understand the benefits of the editor, you need to take a closer look at what this custom editor is and what it does.
What are custom property editors?
🧐
Custom Property Editors (CPEs) are Lightning Web Components (LWCs) that you can plug in with your custom Apex actions or Flow screen components. You can make these editors as sophisticated as you want based on your requirements and trailing imagination.
How ISVs can take advantage of CPEs
When building a feature or product, the design and ease of usage are two fundamental aspects.
With the help of a CPE, you can create highly dynamic, compact, reactive, user-friendly, and eye-pleasing UIs for your complex screen components and Apex actions.
You can enforce custom validation using the CPE on top of the component or action. This is very useful, especially when you want to implement input-based conditional validation. You will also be able to reduce errors caused by incomplete settings and insufficient data, resulting in fewer Flow metadata errors.
Configuring a component or action becomes very easy for end users (primarily admins).
With CPEs, you can build UIs with an entity type so that they’re self-documenting – and users do not need to refer to a reference document separately.
How to build a custom property editor
For practice purposes, let’s create a custom property editor for an Apex action that links two or a private string.
💡
While this use may not have any advanced options or practical utility, it is simple enough to give you a basic understanding of how to get started with configuration options within CPEs.
Step 1: create the Apex action
Let’s take a look at what the dataset format Apex action looks like:
public inherited sharing class ConcatAction {

    @InvocableMethod(label='Concat String')
    public static ActionOutput[] init(ActionInput[] inputs) {
        ActionOutput[] outputs = new ActionOutput[]{};
        for(ActionInput input : inputs) {
            outputs.add(new ActionOutput(input.str1 + input.str2));
        }
        return outputs;
    }

    public class ActionInput {
        @InvocableVariable(label='String 1')
        public String str1;

        @InvocableVariable(label='String 2')
        public String str2;
    }

    public class ActionOutput {
        @InvocableVariable(label='Result String')
        public string linkString;

        public ActionOutput(String str) {
            this.linkString = str;
        }
    }
}
The ’ConcatAction’ Apex action takes in two inputs: ‘String 1(str1)’ and ‘String 2(str2’),’ and they output a ‘Result String’ (‘linkString’).
Step 2: create the custom property editor
You're making a Lightning Web Component by creating a Custom Property Editor and property values.
☝️
When used as a CPE, this web component overrides the default editor, UI, and input parameters for an Apex action.
Let’s call this object type component ‘contactActionCpe’ and look at its code.
import { LightningElement, api } from 'lwc';

export default class ConcatActionCpe extends LightningElement {

    @api inputVariables; // contains information about all the input variables for the action/component.

    /* Declaring Apex action inputs as properties  */
    str1;
    str2;

    connectedCallback() {
        this.setFlowInputs(['str1', 'str2']);
    }

    /** Initializing the inputs on component load from the last saved state
     *  by finding the variable value in the 'inputVariables'.
     */
    setFlowInputs(inputs) {
        inputs.forEach(variableName => {
            this[variableName] = this.getInputVariableValue(variableName);
        });
    }

    getInputVariableValue(variableName) {

        const inputVariable = this.getInputVariable(variableName);
        return inputVariable
            ? inputVariable.value
            : null;
    }

    /** Change handler for the base input components (in html) */
    handleInputChange(event) {
        this.updateFlowInput(event.target.name, event.detail.value, 'String');
    }

    /** Firing change event To report input value changes to Flow Builder with the new input value */
    updateFlowInput(inputVariableName, updatedValue, dataType) {

        this[inputVariableName] = updatedValue;

        const valueChangedEvent = new CustomEvent(
            'configuration_editor_input_value_changed', {
                bubbles: true, //should be true
                composed: true, //should be true
                detail: {
                    name: inputVariableName,
                    newValue: updatedValue,
                    newValueDataType: dataType
                }
            }
        );
        this.dispatchEvent(valueChangedEvent);
    }
}
Just remember that it follows the same naming convention and access to properties as when referencing Web Components in one another.
If you’d like to create more basic properties, a dataset property, advanced properties, list views, and a list of values for your Custom Property Editor components, you can look at UnofficialSF.com.
Time to get editing
Salesforce is a market-leading CRM, so the sky is truly the limit with what you can customize, develop, and streamline. Your business deserves a platform that will take the load off of you while you increase your productivity.
✅
A Custom Property Editor is one code editor you can use to create custom class properties to equip you for success.
This guide is just the tip of the iceberg regarding everything you can do with Apex actions and Custom Property Editors.
The more you learn, the more you will be able to solve, integrate, and innovate solutions.
Harald is the Co-Founder of Hutte, bringing his vision of no-code DevOps to life. His passion enables teams and individuals to focus on what matters most – bringing value to the users they build for.