Salesforce Flow is by far the most potent tool for Salesforce Admins. It is an automation tool that empowers users to create business processes and solutions using clicks.
Salesforce Developer, Technical Writer, and Entrepreneur
Sushrut is a skilled Salesforce Developer, Technical Writer, and Entrepreneur. His expertise includes front-end dev, Web3, and DevRel. He leverages technology to craft exceptional digital experiences.
Manuel Moya Ferrer is a highly skilled freelancer who serves as a technical architect, developer, and DevOps engineer. He specializes in Salesforce solutions, covering all technical aspects of their development lifecycle.
Article highlights
Salesforce Flow is a comprehensive automation tool that enables Salesforce users to create business processes and solutions using a no-code interface.
The tool is versatile, allowing integration with external tools like Gmail and Slack, seamlessly updating data across platforms without manual input.
Flow Builder provides a user-friendly interface where users can manage and create flows, choosing from multiple types of flows including screen and auto-launched flows.
A significant chunk of Salesforce is automation: record creation, submission, custom linking, or any other out-of-the-box configuration. Salesforce Flow can handle them all.
From the basic record creation, updating, deletion, and posting to chatter, Flow can work with much more complex business processes and configurations.
Some everyday use cases of Flow are – mass updates of records, assignments, record stage conversions, etc. Moreover, every new Salesforce release adds more capabilities Flow.
This article will explain Salesforce Flow, its components, use cases, and more. Are you ready to go against the grain but still go with the flow with Salesforce? Great! Let’s hop right in.
Salesforce Flow is an automation tool that takes data input and performs designated tasks.
Flow automates complex business tasks and is super easy to maintain. Salesforce users can build Flow on one or more objects to meet specific business requirements.
Flow also allows you to integrate external tools, such as Salesforce and Gmail or Salesforce and Slack. When data is updated in any of these tools, it can then be automatically updated in all the other connected tools with the help of Flow. This connection is made without having to write code at all.
Salesforce Flow can also automate tasks using a pre-built Flow customized based on user needs.
What is Flow Builder in Salesforce?
Flow Builder is an interface from which you can create or manage new ones. To access it, follow the steps below:
Log into your Salesforce and go to “Setup.”
Search for “Flow” in the “Quick Find” box.
Click on the “Flow” option that pops up.
You’ll land on the Flow Builder page. This page hosts your organization's existing Flow and an option to create one.
Create a new Flow in Salesforce
Once you are on the Flow Builder page, click on “New Flow.
A new page will ask you to choose a Flow type. You have five Flow types to choose from. For now, select “Screen Flow” and click “Create.”
The Flow Builder now launches a page with a new Flow having the start and end points. Everything in between is created by you.
When you click on the ‘+’ sign, you’ll see many options. These are called Flow Elements, each serving a dedicated purpose.
You can select and work with one or more elements. Once you’re done, click “Save” and “Activate” Flow to see it running.
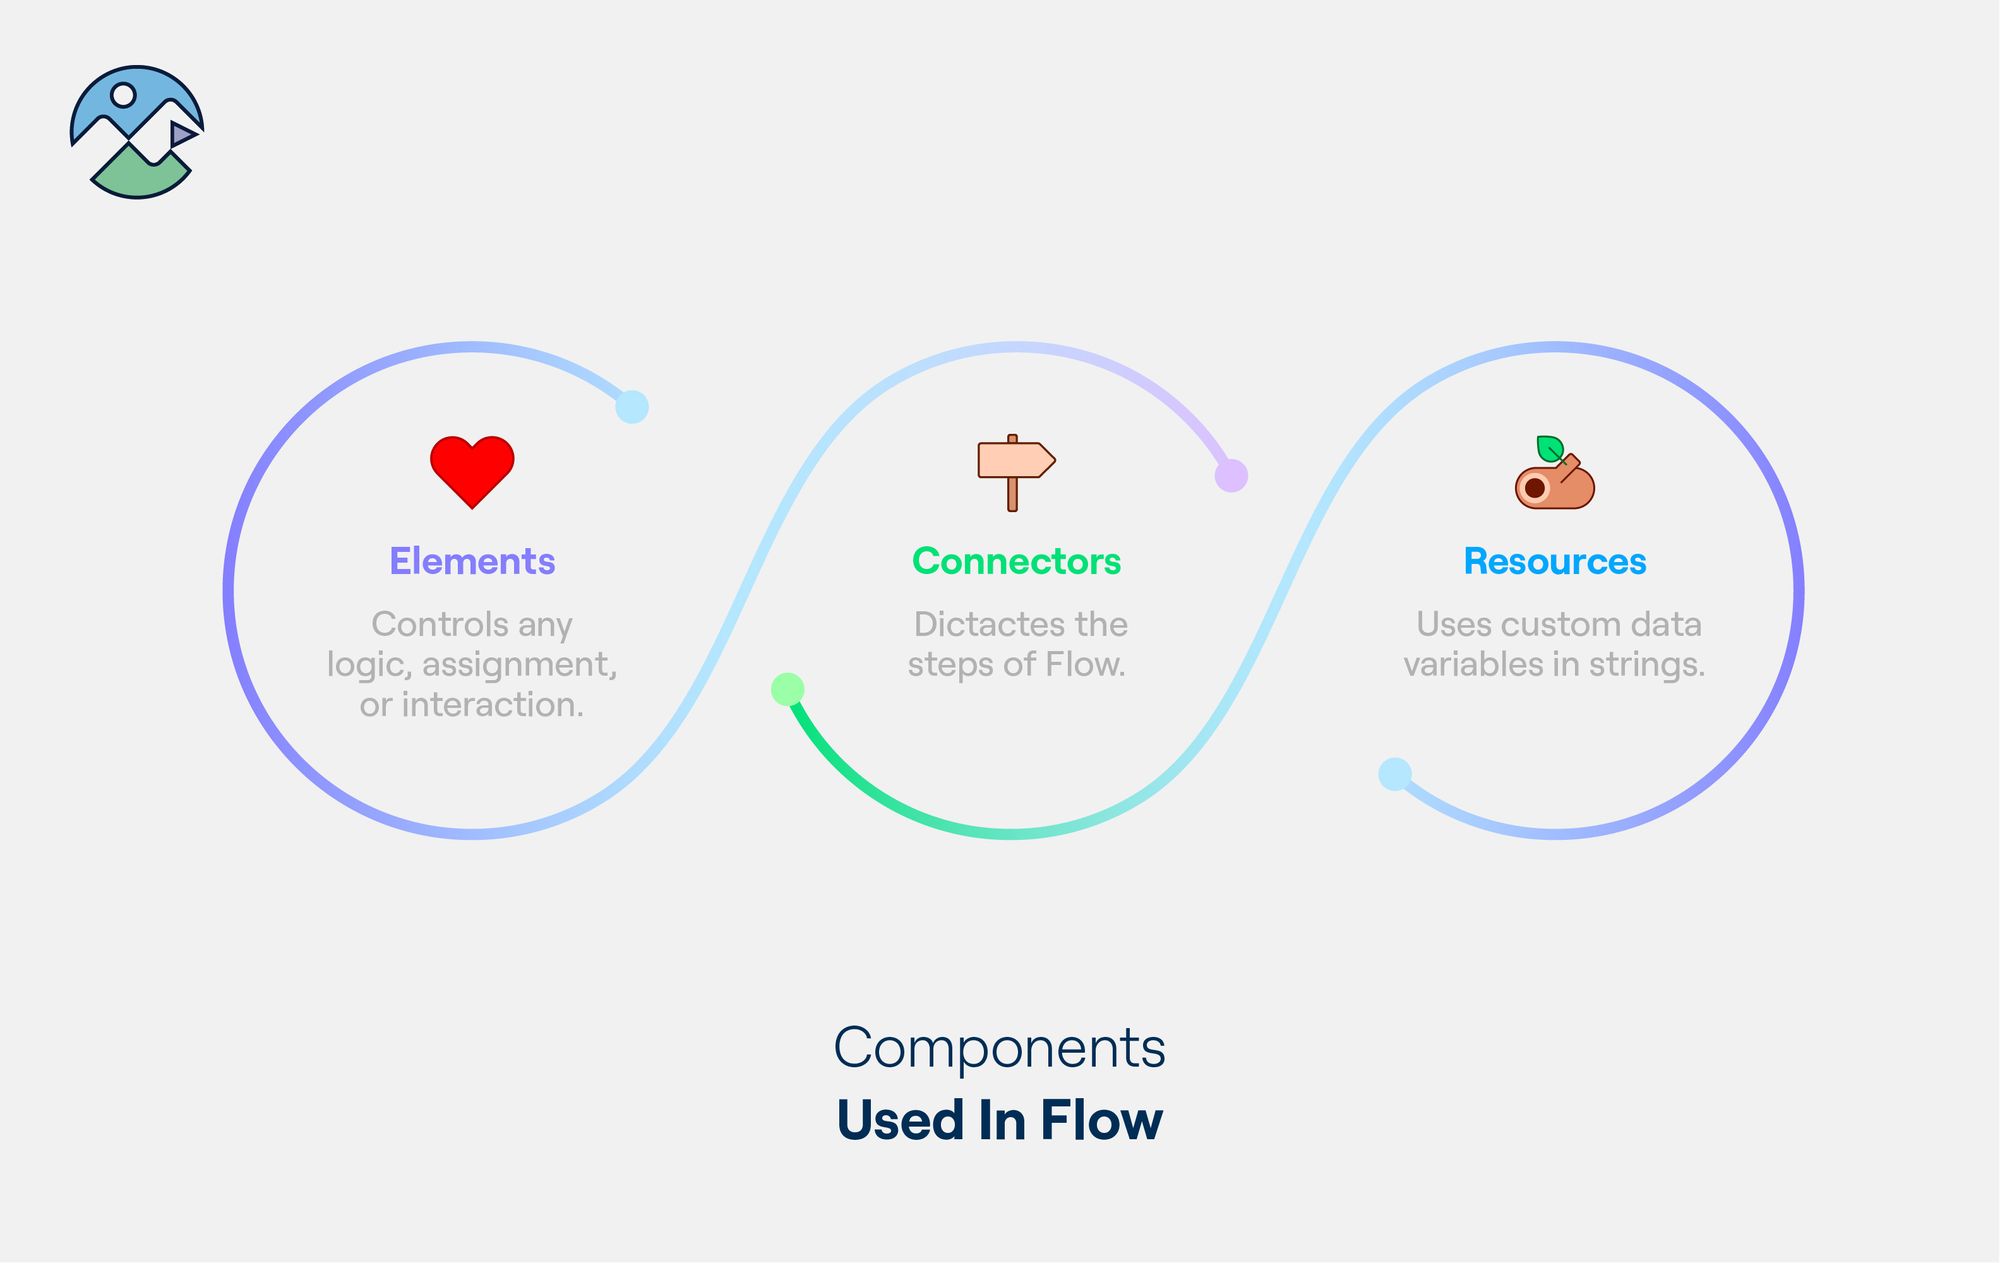
Three building blocks are used in Flow
Elements are the heart and soul of Salesforce Flow. Every complicated logic, assignment, or interaction in Flow is related to elements.
Connectors determine the path of Flow and the steps of what happens when in Flow.
Resources are custom data variables in strings, numbers, formulas, records, etc. These are used to enhance the before or after trigger functionalities of Flow.
Flow elements
The Flow elements are divided into three categories:
1. Interaction
This category hosts Flow elements that gather information from the user, launch one or more sub-flows, and perform external actions. These elements consist of:
“Screen” takes inputs from and shows the user's messages.
“Action” is the element used to ‘call’ other actions that may be based on objects, other users, etc.
“Subflow” can ‘call’ one or more sub-flows in Flow with the help of this element.
2. Logic
This category hosts all the logical operations and assignments you can perform on the input or selected records. Logic consists of:
“Assignment” is a simple assignment of values to the variables.
“Decision” makes a path Flow based on the given conditions. It creates two new paths. For example, a path for ‘True’ and the other for ‘False.’
“Loop” allows you to iterate over a record or value repeatedly.
“Collection Sort” sorts a given set of values or records.
“Collection Filter” filters out values or records based on the given filter.
3. Data
This Flow element handles all the operations related to Salesforce records. Data offers five sub-elements:
“Create Records” allows you to create records based on the values gathered through Flow.
“Update Records” allows you to update records based on the values you’ve collected from Flow.
“Get Records” lets you fetch one or more records and store the required values for later use.
“Delete Records” deletes designated records within Flow.
“Roll Back Records” are cancellations to pending record changes.
When to use Flow
You now know what Salesforce Flow is. But when do you use it? Under what requirements and scenarios can you trigger Flow? What are the different Flow types?
ℹ️
Firstly, it is crucial to understand the type of automation required and the origin and endpoint of data.
Flow can automate a whole sequence of manual processes. For example:
An active Flow can automate record creation, updating, and deletion based on triggers and decisions.
A configurable Flow can trigger records into approval processes and launch sub-flows within themselves.
An authorizing Flow automates the updates and creation of related records and data within the Salesforce platform and external integrations.
Even though Salesforce Flow can perform a wide range of operations and automations, it is not advised to use Flow for every possible requirement. When complex logic is needed to be implementedthat may require heavy debug sessions, it is better to use Apex code. Debugging in a single Flow can prove to be a pain.
We have always used Flows in simple scenarios where it fits or when team members are on the admin side. However, to be honest, I have been cautious with Flows because in complex scenarios (let’s say more than 30 Flow boxes,) I prefer using Apex to ensure quality in the implementation.
Salesforce comes with two main Flow types – a Screen Flow and an Auto-launched Flow. The second type is further divided into four more types. Hence, collectively, we have five Flow types in Salesforce:
Screen Flow
Schedule-Triggered Flow
Record-Triggered Flow
Platform Event-Triggered Flow
Auto-Launched Flow.
Screen Flow
Screen Flow requirements are used whenever we need user input. With a screen sample Flow implementation, you can create a screen (a custom UI) that displays messages, takes input, and guides the user throughout the Flow process.
A Screen Flow is launched from the “Salesforce Utility Bar,” Apex custom action, Lightning Pages, quick actions, and more.
While creating a Screen Element Flow, click on the “Screen” element. You’ll see a bunch of components to add to the screen. For example:
Text area
Picklist
Lookup
Name
Radio custom buttons
Checkboxes
Date and time ranges.
You can create a complete Form to get all the database records, tables, display notes, and warnings. Once you set up your screen and take inputs from the user, you can add elements to create contact records, single update records, perform external actions, etc.
A Screen Flow can prove beneficial in many aspects, such as reducing the requirement for multiple validation rules, providing a logical flow of targeting input from the user, and much more.
Schedule-Triggered Flow
As the name suggests, a Schedule-Triggered Flow is scheduled and launched at the specified time for the given frequency. You can compare this Flow type with Apex batch jobs.
📅
When you create a Schedule-Triggered Flow, you get to set the schedule of Flow. It asks for the date and time along with the frequency. A Schedule-Triggered Flow can be set to run once, daily, or weekly.
To monitor an already scheduled Flow, you can go to the “Scheduled Jobs” page in the “Setup.”
Record-Triggered Flow
A Record-Triggered Flow is mainly incorporated when there is a need to make additional updates on the triggered record. When you create a new Flow and select a Record-Triggered Flow, you need to consider the object on which you want Flow.
You also need to take into account a Record-Triggered Flow, which can be triggered when:
A new record is created
An existing record is updated
A record is created or updated
A record is deleted.
Entry conditions are set to filter the records that enter Flow. This Flow type is called a ‘before-save’ or ‘after-save’ trigger.
There are a few points that you need to consider before using this Flow:
A Record-Triggered Flow can only make changes in the record’s field values.
It can’t update records other than the triggered record.
It doesn’t support Flow actions other than “Assignment,” “Decision,” “Loop Element,” and “Get Records.”
If an object hosts more than one Record-Triggered Flow, you can’t determine the order of execution of each individual Flow.
🏃♂️
Author's note: An important point is that a Record-Triggered Flow can change a record ten times faster than the conventional record change in Salesforce.
Platform Event-Triggered Flow
A Platform Rvent-Triggered Flow can help you manage all your Salesforce automations in one Flow. An Auto-Launched Flow runs in the background and is launched when a new platform event message is received. It can process up to 2K event messages at a time. Although, the order of execution of these batches is unknown.
A platform event allows communication of internal or external applications to Salesforce. It is based on event-driven architecture and follows the publish and subscribe model. It also mainly handles the queue of incoming and processed events.
Auto-Launched Flow
A non-trigger Auto-Launched Flow is invoked only by Apex class, REST API, or a Process Builder. This Flow type covers abstraction, as you can perform complex problems triggered and solved in the background without letting the user know anything.
Flow vs Apex vs Process Builder vs Workflow
🙅
An update since this article was first published: Process Builder and Workflows are now discontinued.
Flow, Process Builders, and Workflows are no-code building automation tools of Salesforce, while Apex is a programming language. However, they all share a similarity – they're used to automate Salesforce processes. But there are critical patterns, behavioral patterns, and differences that are important to know.
Flow vs Apex
Salesforce Flow and Apex are both potent tools. One goes down the no-code path, while the latter is based on coding. A piece of automation processes can be performed using these two.
But, if you are to compare the two, you can do much more with Apex. Let us understand the differences:
The most evident and significant difference between these two is that Flow is a no-code automation tool, and Apex is all about codes.
Apex code requires a seasoned Developer with all the knowledge of Apex and Salesforce governor limits to write efficient code, while Flow is easy to begin with.
In terms of the range of capabilities, Apex stands above Flow. But that doesn’t justify the use of code in every possible scenario.
Apex code favors complex multi-level automation and integrations with external systems and databases. It better handles these complexities. You can also easily control a job's batch size.
Flow vs Process Builders
🙅
An update since this article was first published: Process Builder is now discontinued.
Both Flow and Process Builders are automation tools by Salesforce that depict the same idea. But where do these differ? To be short and concise, a Process Builder is an integrated part of Salesforce Flow. Process Builders can handle slightly easier automations, like updating given or child records.
At the same time, Flow can handle much more complex automation tasks within or outside of Salesforce.
The key differences between these two are:
Unlike Flow, Process Builders do not offer the functionality to add screens to fetch input from the user or show messages.
Although both can be scheduled conditionally, Flow can be interrupted midway. This is not the case with Process Builders. Once the complex processes start and the conditions are satisfied, they can’t be stopped.
Flow is created to perform actions before or after a record save, but Process Builders are limited to after a trigger.
Process Builders only run after a record has been created or updated, but Flow takes it one level up by including the ‘on-delete’ operation.
Process Builders offer a few individual actions that are not available in Flow, including survey invitations and quip actions.
Flow vs Workflow Rules
🙅
An update since this article was first published: Workflow Rules are now discontinued.
Consider Workflows Salesforce's left-out automation tool. As most of the work can be handled by Flow and Process Builders, Workflows are the last resort. Moreover, projects have started migrating Workflow Rules to Flow because Salesforce won’t back Workflows in the future.
Some key differences between the two include:
Unlike Flow, Workflow Rules are not available in Salesforce editions such as “Professional” and “Essentials.”
Workflow Rules don’t offer a wide functionality range. These are limited, such as creating and updating a task or record and sending an email alert or outbound messages.
Workflow Rules have a limit of only 1000 triggers per hour.
Workflow Rules can only make one decision at a time and cannot ‘call’ other automation processes within them. However, Flow allows you to ‘call’ other Apex classes and sub-flows.
Common mistakes while designing Flow
Although Flow is simple to work with, some complex requirements can make you commit mistakes. Here are some of the most common mistakes users make:
Null value check
Most of the time, Salesforce Flow has distribution methods that work on decisions and conditions based on field values. Hence, not having a null value check can prove fatal to the process.
Excessive SOQL queries
Salesforce organizations are often shared, and there are governor limits for different functionalities, especially for SOQL questions. Hence, keeping this in mind while working with a flow is vital.
Wrong field selection
Salesforce objects may have numerous and monotonous fields for complex business solutions. Therefore, setting up the fields carefully in a flow becomes necessary. However, one wrong field can disrupt the whole process.
Sharing and security
The user who triggers Flow should have proper object-level and field-level access to the objects and Flow used in the Flow process.
Salesforce Flow updates
Salesforce Flow is one of the most important and widely used tools of Salesforce. Credited to its popularity and usability, Flow keeps receiving numerous updates with each cycle.
While working as a Salesforce Developer at Capgemini, most of my time revolved around Salesforce Flows. My manager always wanted me to study the Flow updates with every release.
Salesforce Flow Spring '24 updates
Although the Spring '24 rolled out with various Salesforce Flow updates, here are five hand-picked ones:
Transform element aggregation
This Spring '24 update expands upon the transform element (beta) introduced in Winter '24, allowing users to aggregate data from source collections. For example, you can count how often something appears in a list and use that information in your Flow. This makes organizing and using data in Flow much easier.
The introduction of the repeater component (beta) in Screen Flows enhances user experience by enabling the capture of repetitive data on a single screen. Flow Builders can eliminate the hassle of navigating through multiple screens to populate recurring information with this component.
Imagine if your Flow could predict what you need before asking for it. That's what the Data Cloud AI does. It uses AI technology to make suggestions based on patterns in your data. By incorporating AI predictions directly into Flows, you can optimize workflows and drive business outcomes with data-driven intelligence.
Connecting Flow to other systems used to be complicated, but now it's easy. With the new HTTP callout feature, users can now configure HTTP callouts more efficiently by pulling sample responses from endpoints to automate configuration. Additionally, the ability to validate response information ensures seamless connectivity and data exchange between Flow and external systems.
Before, there was a limit to how many Flows you could pause. But now, there's no limit at all! You can pause and resume Flows whenever you need to, without any restrictions. It's like having an endless supply of pause buttons, so you never have to worry about running out of time to finish what you're working on.
The previous per-org limitations were 30K for Essentials and Professional editions and 50K for Enterprise, Unlimited, Performance, and Developer editions.
Let’s now talk about the latest Summer ‘24 Flow Builder updates.
New Flow creation wizard and Flow types
With the Summer '24 update, Salesforce introduced a revamped Flow creation experience. Users now get a new wizard-style interface that offers the flexibility to create a Flow from scratch or choose from various templates. This release also introduces new Flow types, expanding the range of available automation options.
The introduction of action buttons in the Summer '24 release elevates user interaction within Flows. These buttons enable users to execute and utilize the results of autolaunched Flows directly on the same screen, streamlining processes and enhancing workflow efficiency. This feature empowers users to use screen Flows more effectively to meet their business requirements.
🗣️Author's note: This is how Salesforce's Adam White announced the button launch via LinkedIn.
Flow repeater component now generally available
Building on previous releases, the Summer '24 update sees the Flow repeater component becoming generally available. This component allows users to gather user input to compile a list of records from a single screen, with the option of conditional visibility. This enhancement offers greater flexibility in designing dynamic and intuitive Flows.
Summer '24 significantly enhances the "create element," enhancing Flow automation capabilities. Users can now prevent duplicate record creation by checking for matching records before proceeding. Additionally, automatically mapping required fields simplifies configuration, ensuring data accuracy and efficiency in record creation Flows.
Following its initial introduction in Winter '24, the "transform element" is now generally available to all users in Summer '24. This integral feature of Flow Builder enables easy data manipulation and transformation within Flows, empowering users with enhanced data handling capabilities.
Summer '24 introduces native support for email threading in the "send email action." Email threading facilitates the organization of related emails, fostering a more streamlined communication experience. This enhancement enhances email management efficiency and promotes clearer communication within the Salesforce ecosystem.
With the Summer '24 release, users can manually lock or unlock records using the new "lock record action" in Flow. This feature allows for greater control over record access and manipulation, enabling users to specify locking conditions and exemptions for designated users, groups, or queues.
Salesforce introduced the Automation Lightning app in Summer '24, providing users with a centralized hub for Flow and process automation management. This new app allows users to access Flows, errors, and community-based resources directly from the main application interface, offering enhanced visibility and accessibility to automation functionalities. In my opinion, it's probably the coolest update!
As technology evolves at an unprecedented pace, it's natural to wonder what lies ahead for Salesforce Flows. We witness significant enhancements and innovations with each release that reshape how businesses automate their processes.
We can expect significant changes that could make Flows even better and easier to use. From what I've been thinking, Salesforce might introduce different levels of Flows and AI capabilities in the coming decade.
My assumptions
Tiered system for Flows: Salesforce may introduce a tiered system for Flows, offering different levels of functionality to suit users' varying needs. This system could range from basic features suitable for beginners to advanced capabilities tailored for experienced Salesforce Developers. This tiered approach may help users of all skill levels effectively utilize Flow for their specific requirements.
AI-powered templates and structures: Another possibility is the integration of AI technology into Flow templates and structures. With AI algorithms at play, Flow users could benefit from automated template generation based on their business processes. These templates would come pre-configured with optimized structures, simplifying the setup process and reducing the time required for manual configuration.
🤔
Author's note: I may be wrong, but one thing I can say for sure is that Salesforce Flow is only going up from here, especially after the discontinuation of Workflow Rules and Process Builders. What do you think?
Is Salesforce Flow the most powerful automation tool?
This question has been the subject of much debate. However, the answer seems relatively straightforward. As we’ve discussed, Salesforce announces new features and capabilities of Flow with every new release. It won’t be far off to say that Flow is the superlative of Process Builder and Workflow.
Also, Salesforce announced the retirement of Process Builders and Workflow Rules at Dreamforce 2021. Moreover, as Flow has almost all ‘Apex-like’ functionalities, it is arguably the most powerful automation tool by Salesforce.
Flow is a powerful automation tool that puts Salesforce Administrators on a level with Developers.
🏆
Learning how to leverage Flow will help you develop better and faster Salesforce solutions.
Salesforce Administrators who excel at working with an auto-launched Flow can create a whole business process without writing a single line of Apex code. You can build custom business logic within a few hours using just Flow.
If you are a Salesforce Admin, it is beneficial to become one of the many Flow users as soon as possible. You can forge a Salesforce Flow to almost any weapon you like.
Spring Release Updates
Transform Element Aggregation
Introduced in a prior release, the Transform element now enables aggregation of data from source collections to count or summarize items, which can be utilized throughout your Flow to enhance data handling and manipulation.
Validate Input Menu in Flow Data Table
The Spring '24 Release introduces input validation properties for the Data Table component and other components in Salesforce Flow, enhancing form usability and data integrity.
Text Templates Support Reactivity
Text Templates within Salesforce Flow can now react to changes in real-time, providing dynamic feedback as users interact with screen components, thereby improving user experience and workflow efficiency.
Repeater Component for Screen Flows
This new component allows users to enter repetitive data on a single screen, reducing the need for multiple pages and streamlining data entry processes.
Sushrut is a skilled Salesforce Developer, Technical Writer, and Entrepreneur. His expertise includes front-end dev, Web3, and DevRel. He leverages technology to craft exceptional digital experiences.